AetherBox / Setup guide
Set up your AetherBox
Five steps, just a few minutes. Cable it to your router, power it on, then bind it to your Tailscale account from the console. This guide ends the moment the device is connected.
Reach the machine. Even when it can’t reach you.
Before you start
What you need on hand
Tailscale is how you reach AetherBox once you leave the building. It puts the unit on a private network only your own devices can join, so there are no ports to forward and nothing of yours facing the public internet. Your account is what the unit enrols into — which is why it is the one thing here you cannot work around.
Ordered with turnkey deployment? Tailscale is already installed and enrolled on your unit. You still need the account, but not the setup: steps 1 to 3 apply, and you stop after that.
Required
A Tailscale account. Free personal accounts work. Create one at tailscale.com before you begin.
Network
A free LAN port on your router. Not the WAN or internet port — a numbered LAN port.
Power
A power outlet near the router. The supplied cable is short by design.
Setup device
A computer or phone on the same network. Used once, in the last step.
In the box
Check the contents
Four items. If anything is missing or damaged, stop here and get in touch before powering the unit on.
AetherBox unit
The appliance itself
35 W power brick
Use this one only
USB-C cable
USB-C to USB-C, for power
Ethernet cable
AetherBox to router
Ports
Two connectors, one side of the unit
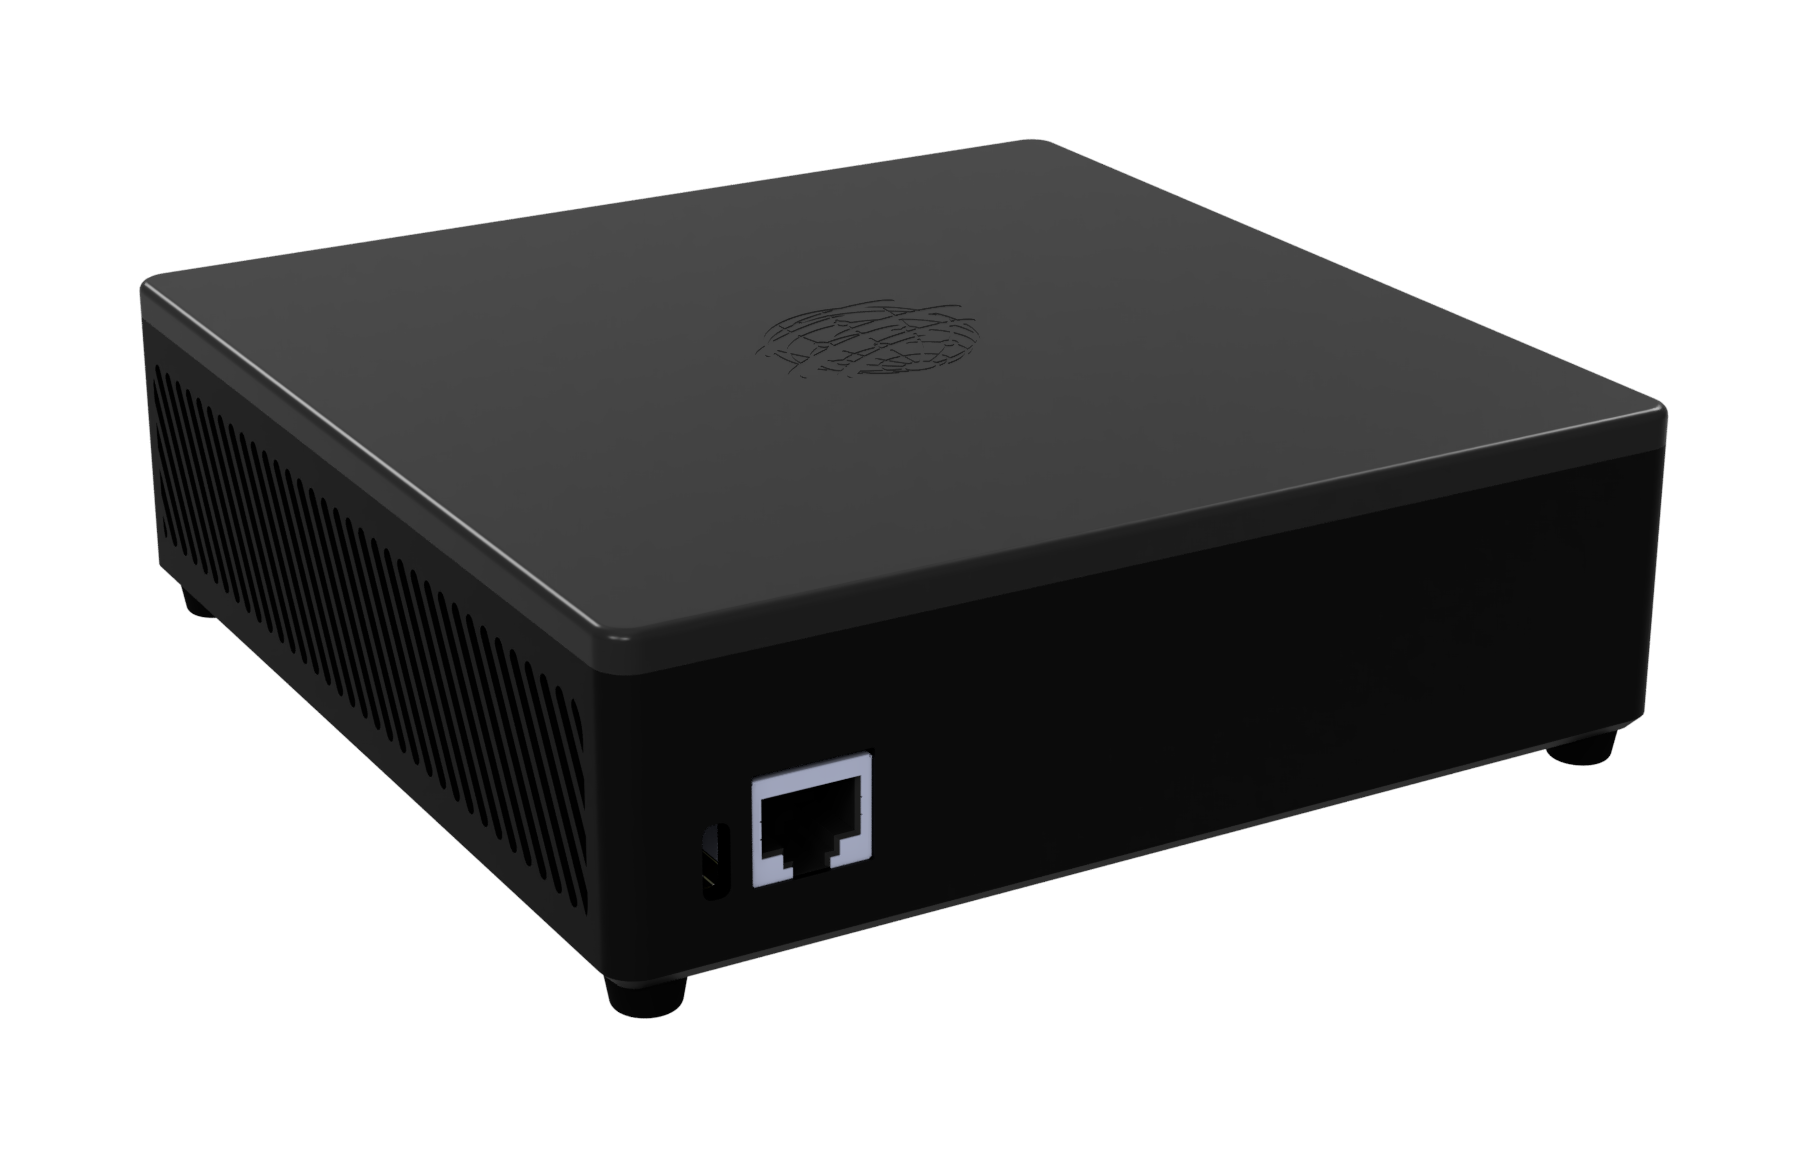
USB-C power in
The narrow slot on the left. Supplied cable and 35 W brick only.
Ethernet
The wider square socket beside it. Goes to a LAN port on your router.
Nothing else needs plugging in. The vents on the side stay clear.
Setup / Five steps
-
Choose a location
Put AetherBox within Ethernet reach of your router — the cable has to physically plug into the router. Keep a power outlet nearby and leave a hand’s width of clearance around the unit so it can breathe.
A shelf or desk beside the router is ideal.
-
Connect the cables
Ethernet first, power second. In that order the unit boots with a network already present.
- Run the Ethernet cable from the AetherBox Ethernet port to a LAN port on your router. LAN ports are usually numbered and grouped together. Do not use the WAN port — it is the odd one out, usually a different colour, and marked WAN or Internet.
- Plug the supplied USB-C cable into the AetherBox USB-C port, then into the supplied 35 W brick, then into the outlet.
Supplied brick only
AetherBox draws power over USB-C Power Delivery. A charger that does not negotiate PD correctly can damage the unit, and an underpowered one will appear to work and then fail under load. Use the brick and cable that came in the box — nothing else.
-
Power on and read the address
The screen comes alive as soon as power reaches the unit and stays busy through boot. Give it about a minute. When it has finished, the screen settles on the device’s local IP address — four numbers separated by dots.
On the screen
192.168.1.42
Your number will differ. Write down whatever yours says.
No address after that wait? Check the Ethernet cable is in a LAN port and seated at both ends, then unplug power for ten seconds and try again.
-
Sign in to the console
From your computer or phone — it must be on the same network as AetherBox — type the address from the screen into your browser’s address bar and press return. The console asks for credentials.
If an administrator is performing the setup of this device, start a screen-share session with them now so they can remote in and finish the installation.
- Username
- admin
- Password
- admin123
These are the factory credentials. Change the password from Settings › Account once setup is finished.
Before you change it
There is no software reset for this password. If it is lost, getting back into the console means physically opening the unit — so keep the new one somewhere you will still have it in a year. Note also that what actually guards AetherBox is your Tailscale access controls, not this password: anyone who can reach the unit on your tailnet reaches the console login. Keep the tailnet tight.
-
Bind AetherBox to your Tailscale account
Five clicks inside the console, one of them in a Tailscale popup. Don’t close the console tab while the popup is open.
- Click the settings wheel on the toolbar, then choose Tailscale in the sidebar.
- The panel reads “Tailscale not found”. Click Install and wait for it to finish.
- The panel now says the device isn’t bound yet. Click Login to bind the account.
- A Tailscale popup opens. Sign in with your Tailscale account and approve the device.
- Return to the console tab and click Login success. AetherBox is connected.
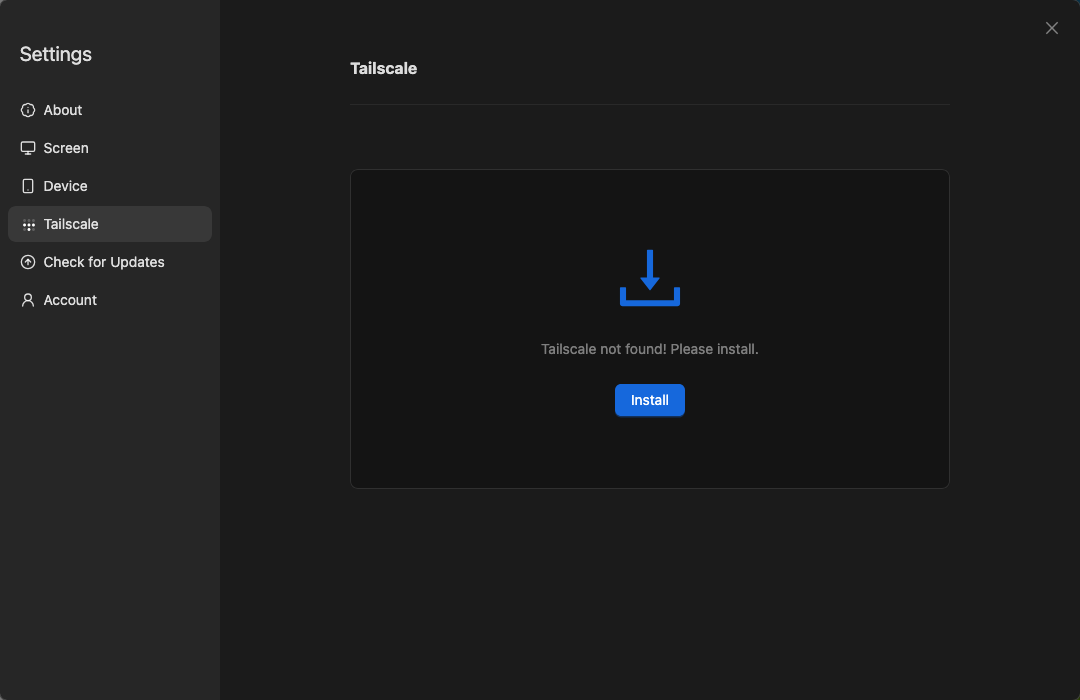
Step B / Install 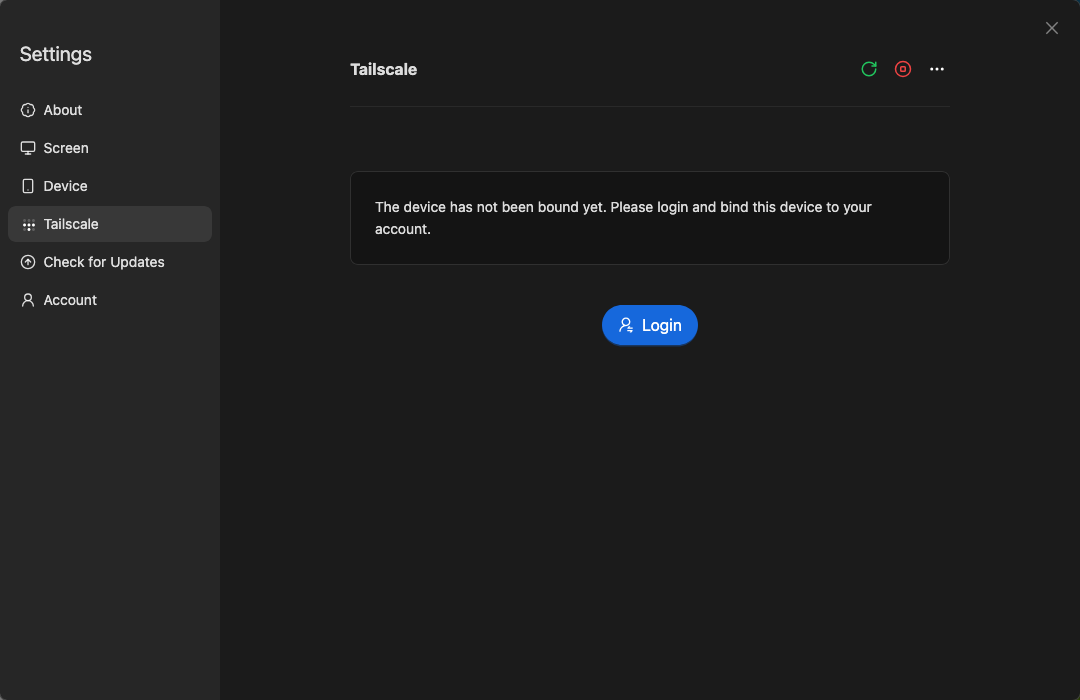
Step C / Login
Done
AetherBox is on your tailnet
The unit now appears in your Tailscale device list and stays reachable from anywhere you’re signed in. Leave it powered and cabled; it needs nothing further from you.
Questions about your unit kvmconnect.net/contact